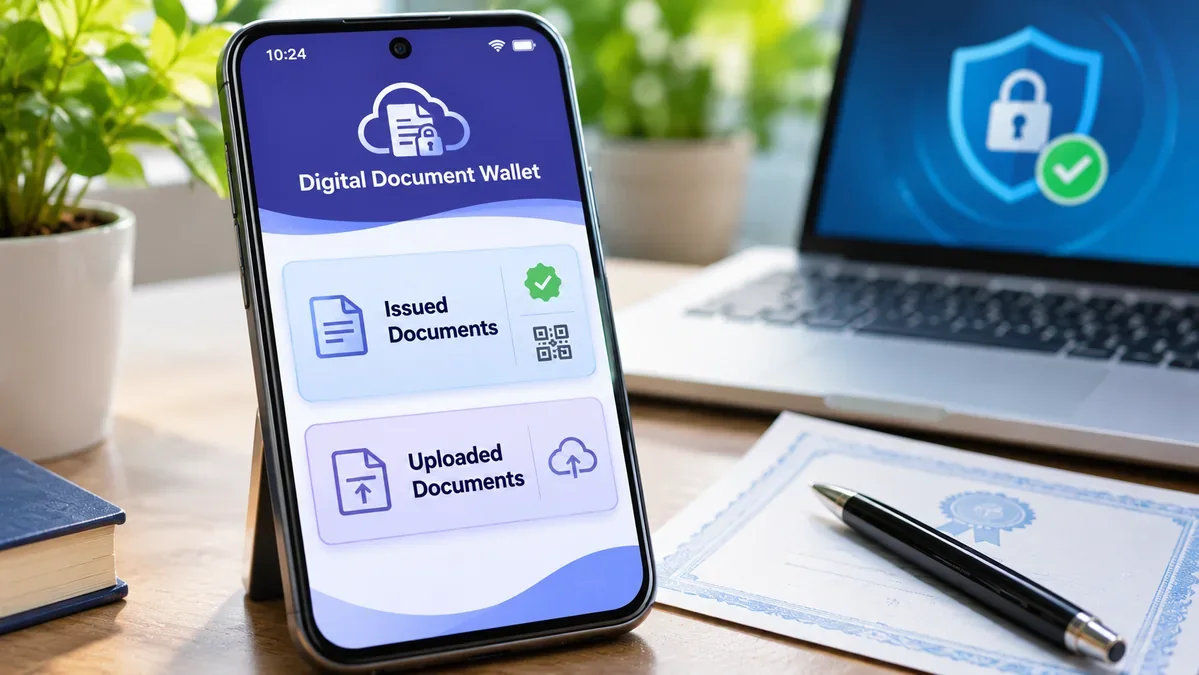
DigiLocker can store both official digital records and files that you upload yourself, but the two are not the same. A marksheet fetched directly from an authorised education board may appear in your Issued Documents section. A scanned marksheet that you add from your phone or computer appears in your Uploaded Documents area or DigiLocker Drive. Uploading a scan does not turn it into an issuer-verified digital certificate.
This difference matters when you submit documents for admission, recruitment, identity checks or government services. This guide explains how to identify an issued document, fetch a record from its issuer, check its details, verify a secure QR code and share it safely. It also explains what to do when a marksheet, driving licence or certificate is missing.
Issued Documents vs Uploaded Documents: What is the difference?
DigiLocker describes an issued document as an electronic record made available by a government department or another registered issuer directly from the original data source. The record is listed in the Issued Documents section and has a document URI, which is a unique reference generated for that document.
An uploaded document is a file that you add to your own DigiLocker storage. It may be a scan, photograph, downloaded PDF or another supported file. It is useful for keeping your paperwork together, but DigiLocker does not verify the issuer or certify the contents simply because you uploaded the file.
| Feature | Issued Document | Uploaded Document |
|---|---|---|
| Who supplies it? | A registered issuer, such as a government department, board or institution. | You upload the file from your device. |
| Where does it appear? | Issued Documents section. | Uploaded Documents or DigiLocker Drive. |
| Source of record | Fetched from the issuer’s record system or repository. | The file you selected and uploaded. |
| Document URI | Issued records have a unique URI. | A normal uploaded file does not become an issuer-issued record merely by being stored. |
| Verification | May be checked through the issuer’s digital signature, secure QR code or verification service, where provided. | Must be authenticated separately with the original issuer or receiving organisation if proof is required. |
| Best use | Prefer this for official submission when the required record is available and the receiving authority accepts it. | Personal storage, reference or a file copy where the recipient specifically allows it. |
DigiLocker’s official FAQ explains that issued documents are supplied by registered agencies from their original data sources, while uploaded documents are files added by the user. The same physical certificate can exist in both sections, but the two copies have different provenance. Read DigiLocker’s official FAQ.
Why an uploaded PDF is not the same as an issued certificate
Imagine that you have a Class 10 marksheet. You scan the paper marksheet and upload the image or PDF to DigiLocker Drive. The file is now stored in your account, but the upload process has not checked the marks against the education board’s database.
Now imagine that you select the relevant board under Browse Documents, choose the marksheet document type and enter the requested roll number and examination year. If the board has made the record available and the details match, DigiLocker can fetch the electronic record into Issued Documents. That fetched record has a source that can be checked by a verifier.
The practical rule is simple: use the record from Issued Documents when an official digital document is required and the issuer has made it available. Do not describe a personal scan as a DigiLocker-issued certificate.
How to find and fetch an official document in DigiLocker
The labels and screen layout may change between the DigiLocker website and app, but the general process is to search the registered issuer and request the exact document using the details that issuer requires.
- Open the official DigiLocker website or the official DigiLocker mobile app.
- Sign in to your existing account. Use only the official service and never share your password, PIN or OTP with another person.
- Open Browse Documents, Search Documents or the equivalent document-search option shown in your account.
- Choose the correct category, such as Education, Identity, Transport or Government and Public Sector.
- Search for the department, board, university or other issuer that created your document.
- Select the exact document type, such as marksheet, passing certificate, migration certificate, driving licence or registration certificate.
- Enter the identifying details requested by that issuer. These may include a roll number, registration number, document number, date of birth or examination year.
- Review the details before submitting the request.
- If the record is found and fetched successfully, open Issued Documents and confirm that the new document appears there.
Do not choose a similarly named issuer just because it appears first in search results. A university, examination board, state department and national authority may be separate issuers. Check the name shown on your original document and select the matching authority.
Example: Fetch a Class 10 or Class 12 marksheet
For an education record, start with the board or university that conducted the examination. If you studied under CBSE, for example, DigiLocker provides a CBSE issuer and a dedicated academic repository. Other boards and institutions have their own availability and procedures.
- Sign in to DigiLocker.
- Open Browse Documents or Search Documents.
- Choose the Education category.
- Search for the issuing board or institution, such as Central Board of Secondary Education when applicable.
- Choose the required record, such as Class X marksheet, Class XII marksheet, passing certificate or migration certificate.
- Enter the examination year, roll number and any other details requested on screen.
- Submit the request and wait for the issuer record to be fetched.
- Open Issued Documents and check the record and details.
CBSE’s DigiLocker academic repository provides digital marksheets, passing certificates and migration certificates for the examinations and records it has made available. Its instructions can differ by examination year and student group. Visit the official CBSE DigiLocker repository.
If your board or examination year is not listed, do not assume the marksheet is invalid. An issuer may not have integrated a particular record, year or document type. Check the board’s official website or contact its records department for the correct route.
How to verify that a DigiLocker document is genuine
Do not rely only on the appearance of a PDF, a logo or a file name. Use the verification method supported by the issuing authority and the document.
1. Confirm where the record appears. Check that the document is listed in Issued Documents, not just in Uploaded Documents or Drive.
2. Check the issuer and record details. Confirm that the issuing organisation, document type, name, roll or registration number, examination year and other relevant fields match the original record.
3. Check the secure QR code, if present. Open the official DigiLocker mobile app and use its built-in QR scanner to scan the code printed on the digital document. Follow the verification result shown by the app. Do not assume that any ordinary QR code on a PDF is a secure DigiLocker verification code.
4. Verify the digital signature where supported. Some documents carry a digital signature from the issuing authority. The DigiLocker guidance notes that digitally signed documents can be checked on a PC or laptop using the relevant PDF signature validation software. A signature warning or invalid signature should be investigated rather than ignored.
5. Use the issuer’s verification portal when instructed. Some documents include a document number, reference number or verification code that can be checked on the issuer’s own portal. Type the official website address yourself or use a link from the issuer’s verified website.
DigiLocker’s published guidance describes secure QR verification, digital signatures and issuer verification portals as methods used by participating issuers. Not every document necessarily offers all three methods. See the official DigiLocker guidance for issuers and verification.
How to check a DigiLocker QR code safely
- Open the official DigiLocker app on your phone.
- Find the QR scanner or document verification option provided in the app.
- Allow camera access only to the official app when requested.
- Point the camera at the secure QR code on the issued document.
- Wait for the verification result and check the document information returned.
- Compare the verified name, issuer and document details with the copy you were given.
If the scanner cannot read the code, try a clear, complete copy of the document. Avoid cropping the QR code, changing its size or scanning a blurry screenshot. If verification still fails, use the issuer’s official verification service or contact the issuer.
Never enter an Aadhaar number, account password, PIN or OTP into a website opened from an unknown QR code. A QR code is a way to encode information or a link; it is not proof that the page it opens is genuine.
Are DigiLocker documents legally valid?
DigiLocker states that documents issued through the platform are legally equivalent to physical originals under the applicable Digital Locker rules. Its Terms of Use refer to the Information Technology (Preservation and Retention of Information by Intermediaries Providing Digital Locker Facilities) Rules, 2016. The official FAQ also describes issued electronic records as authentic documents fetched from the issuing agency.
This does not mean that every file stored in DigiLocker is automatically an official certificate. An uploaded scan remains a user-uploaded file. For an official submission, use the issuer-fetched record and follow the receiving organisation’s instructions about how it accepts digital documents, including whether it wants a DigiLocker URI, an electronic PDF, a QR-verifiable copy or a particular application workflow.
For example, a recruitment portal may provide a specific DigiLocker consent or document-sharing step. A college may ask for a marksheet from a particular board or year. Follow that process rather than uploading a random Drive copy and assuming it will be treated as an issued record.
Official references: DigiLocker Terms of Use and DigiLocker FAQ.
How to share an issued document with an organisation
When a receiving organisation supports DigiLocker, sharing through the platform can make it easier for the organisation to verify the issuer record. The exact steps depend on the service requesting the document.
- Open Issued Documents and select the required record.
- Check that it is the correct document and issuer.
- Choose the Share option or follow the DigiLocker consent flow shown by the receiving service.
- Review the organisation or requester name and the document being requested.
- Give consent only when you recognise the organisation and understand what document you are sharing.
- Complete the share or authorisation step and keep the confirmation for your records.
Some government portals let you fetch or share documents from DigiLocker directly inside an application. Use the official portal and the consent screen presented there. Avoid sending public links to sensitive records or posting document QR codes on social media.
Why is your document missing from Issued Documents?
A missing record is frustrating, especially when an admission, job application or government deadline is close. It does not automatically mean that the document is fake or that your qualification is invalid. First identify whether the issuer has made that particular record available through DigiLocker.
- Issuer not integrated: The relevant department, board or institution may not be registered as an issuer for that document.
- Document type not available: The issuer may provide a marksheet but not a migration certificate, or may support some document types but not others.
- Examination year not published: The record may not yet be present in the issuer’s DigiLocker repository.
- Incorrect details: A wrong roll number, registration number, document number, year or date of birth can prevent a match.
- Different issuer name: A document may be listed under a board, department or institution name that differs from the short name you searched.
- Source database issue: The issuer’s data may be incomplete, unavailable or temporarily inaccessible.
Search the issuer again using its full name, check the required document type, and compare each entry with the original certificate. If the record still cannot be found, ask the issuing board or institution whether your year and document type have been published to DigiLocker.
What does a details mismatch error mean?
A message saying that the details do not match the issuer’s data generally means the information entered in the fetch request did not match the source record. It may be a simple typing error, but it can also point to a difference in the original issuer database.
- Check the roll number or document number character by character.
- Confirm the correct examination year, passing year or issue year.
- Check whether the form asks for a registration number rather than a roll number.
- Enter the date of birth in the format requested by the issuer.
- Use the name and details recorded by the issuing authority rather than a nickname or later edited spelling.
- Try again once after checking the details. Avoid repeated guesses.
For driving licence and vehicle registration records fetched through the Ministry of Road Transport and Highways database, DigiLocker explains that the name in Aadhaar may need to match the name in the driving licence or registration record. If the record is missing from the National Register or details still do not match, check the relevant official Parivahan service and contact the transport authority that maintains the record.
Check driving licence status on Parivahan · Visit the Vahan portal.
What if the same Aadhaar is already linked to another DigiLocker account?
DigiLocker explains that an “Aadhaar is already registered” message can appear when the Aadhaar number is already linked to an existing account and a second account is being created. Do not keep creating new accounts or share your Aadhaar details with someone who offers to fix it.
Use the official DigiLocker sign-in and account-recovery options, such as Forgot Username or Forgot Password, to try to recover access to the existing account. Follow the identity checks shown by the official service. If recovery does not work, raise a support request through the official DigiLocker Helpdesk.
Should you upload a scan if the issued document is unavailable?
You can use DigiLocker Drive to store a scan or photograph for your personal records. This can be convenient when you want a backup of a paper certificate or another file that the issuer has not made available electronically.
However, label it honestly and remember what it is: a user-uploaded copy. If a college, employer or government service asks for an issuer-verified document, a scan in Drive may not meet that requirement. Ask the receiving organisation what alternative proof it accepts, and ask the issuer about obtaining or verifying the official record.
Never modify marks, names, dates, grades, seals or other information on a certificate to make a scan appear official. If an original record contains an error, request a correction from the issuing authority.
Security tips before using DigiLocker
- Use the official website at digilocker.gov.in or the official app linked from it.
- Do not share your OTP, security PIN, password or recovery codes with anyone claiming to be support staff.
- Check the website address before signing in, especially when opening a link sent by message.
- Review the requester name and the document requested before giving sharing consent.
- Log out from public or shared computers and do not save your credentials in a public browser.
- Keep your phone, browser and DigiLocker app updated.
- Use the Activity section to review account actions such as uploads, downloads and shares when available.
- Keep a safe backup of important original records and follow the issuer’s procedures for corrections or replacements.
Frequently asked questions
Are Uploaded Documents and Issued Documents the same in DigiLocker?
No. Issued Documents are supplied by a registered issuer from its source records. Uploaded Documents are files that you add to your own DigiLocker Drive. Uploading a scan does not convert it into an issuer-issued certificate.
Can I upload my marksheet and make it an official DigiLocker marksheet?
No. You can store a scan in DigiLocker Drive, but only the issuing board or institution can supply its official digital record through the issuer integration. Contact the board if the record is not available.
How do I know whether a DigiLocker marksheet is genuine?
Check that it appears under Issued Documents, confirm the issuer and student details, and use the secure QR scanner, digital signature or issuer verification portal when that method is provided.
Can I use a DigiLocker-issued document for a job or college admission?
DigiLocker says issued documents are legally equivalent to physical originals under the applicable rules. Check the recruitment notice, admission instructions or receiving portal for the exact document and submission method required.
Why is my marksheet not showing in DigiLocker?
The issuer may not have published that document type or examination year, or the details entered may not match its source record. Check the issuer and details, then contact the board or institution if it remains unavailable.
Can I share a DigiLocker document with another person?
DigiLocker provides document-sharing options. Check the recipient or requester and give consent only when you intend to share that specific record. Avoid public links for sensitive documents.
What is a document URI in DigiLocker?
A URI is a unique reference generated by the issuer for an electronic document. DigiLocker uses it to resolve the document to the issuer’s repository.
Can an uploaded PDF be QR verified?
A QR code printed on an uploaded PDF is not automatically a DigiLocker-issued verification code. Use the official scanner or issuer verification service and confirm that the result matches the document and its source.
Official DigiLocker links and support
| Official resource | Use it for |
|---|---|
| DigiLocker official website | Sign in, browse issuers and access your digital documents. |
| DigiLocker FAQ | Understand issued and uploaded documents, document URIs and common account or fetch issues. |
| DigiLocker verification portal | Explore the official document verification service and available document issuers. |
| CBSE academic repository | Access CBSE digital academic records and certificate QR guidance. |
| DigiLocker Helpdesk | Submit and track account, document and service support requests. |
| Parivahan | Check official transport records and related driving licence services. |
For more practical privacy guidance, read our guide on how to remove GPS location data from photos before sharing.
The key point is to check the source, not just the file. Use an issuer-fetched record from DigiLocker when you need an official digital document, verify its details and QR or signature where available, and treat personal uploads as stored copies rather than verified certificates.