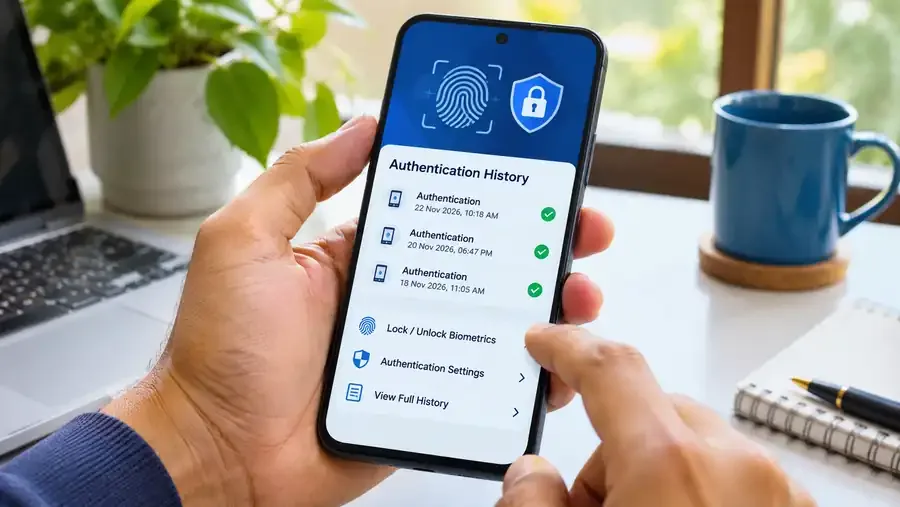
Your Aadhaar number may be used to verify your identity when you access a government service, complete a bank-related process or use another service that supports Aadhaar authentication. You do not have to guess where or when those checks happened. UIDAI provides an Authentication History service that lets you review recent authentication records linked to your Aadhaar.
Checking this history is a useful privacy habit, especially if you receive an authentication alert that you do not recognise. You can also lock your Aadhaar biometrics to prevent fingerprint, iris and face-based authentication until you temporarily unlock them again. This guide explains how to check the records, understand what each entry means, lock or unlock biometrics, and respond to activity that looks unfamiliar.
Important: Use only the official UIDAI website or official Aadhaar app. Never share your Aadhaar number, OTP, Virtual ID (VID), or authentication details with someone who contacts you unexpectedly.
What is Aadhaar Authentication History?
Aadhaar Authentication History is a UIDAI service that displays records of authentication transactions made using your Aadhaar number or Virtual ID. Authentication is the process in which a service provider sends an Aadhaar-based verification request to UIDAI. Depending on the service, the request may use an OTP, biometric information or demographic details.
The history helps you review when a request was made, which authentication method was used, the name of the Authentication User Agency (AUA), and whether UIDAI marked the request as successful or failed. It is useful for checking your own activity and for collecting transaction details if you need to ask a service provider about a record.
What information can you see in the history?
UIDAI says an authentication-history entry can include the following information:
- Authentication modality, such as OTP, biometric or demographic verification.
- Date and time when the authentication request was processed.
- UIDAI response code for the transaction.
- Name of the Authentication User Agency (AUA) that submitted the request.
- AUA transaction ID, which can help the agency trace the request.
- Authentication response, shown as success or failure.
- Error code, when the authentication did not succeed.
The AUA name is particularly useful when you are trying to identify an unfamiliar entry. It identifies the authorised agency or service provider associated with the request. It may not, by itself, explain the exact screen, employee or reason for which the service provider initiated the verification. Contact that agency and quote the transaction details if you need more context.
How far back can you check Aadhaar authentication history?
UIDAI’s current Authentication History FAQ says that residents can review records from the previous six months. The portal displays a maximum of 50 records at a time. If you have more than 50 records, choose a narrower date range in the calendar and check the results again.
This is a rolling history, not a permanent account of every occasion on which you may have shared your Aadhaar details. It records Aadhaar authentication transactions received by UIDAI. Simply typing your Aadhaar number into a form or sharing a photocopy is not necessarily an authentication transaction and should not be assumed to appear in this list.
How to check Aadhaar Authentication History online
You can check your records through UIDAI’s official myAadhaar portal. Keep the mobile phone linked to your Aadhaar nearby because a registered mobile number is required for this service.
- Open the official myAadhaar portal in your browser.
- Find the Authentication History service. If the service is not immediately visible, use the portal’s service list or search facility.
- Enter your Aadhaar number or Virtual ID (VID), as requested by the portal.
- Complete the security code or captcha shown on the screen and continue.
- Request the OTP and enter the one-time password received on your Aadhaar-registered mobile number.
- After verification, choose the date range you want to review and view the available authentication records.
- Check the date, time, modality, AUA name, response and any error code for each entry.
The names and arrangement of portal menus can change. Follow the instructions displayed on the official myAadhaar website if the labels differ from those described here. Do not enter your Aadhaar details on a lookalike website reached through an advertisement, message or unknown link.
How to check authentication history using the Aadhaar app
UIDAI also lists Authentication History as a service in its official Aadhaar mobile app. The app is available for Android and iPhone. Download it only from the official app stores using the links in the reference table below, and check that the publisher is UIDAI.
- Install the official Aadhaar app from Google Play or the Apple App Store.
- Open the app and follow its registration or sign-in instructions. UIDAI’s published registration guidance includes selecting a language, entering the Aadhaar number, accepting the terms and privacy policy, selecting the SIM, completing face authentication and setting a six-digit app PIN.
- After signing in, locate the Authentication History service in the app.
- Follow the app’s identity-verification prompts and select the period you want to review.
- Check the entries and note any transaction you do not recognise.
App screens can be updated independently of the website. Use the current instructions displayed in the official app rather than relying on screenshots from an old version or a third-party tutorial.
How to understand an Aadhaar authentication record
Do not judge a record only by whether it says successful or failed. Review the full entry, especially the modality, date and time, AUA name and error code.
| Field | What it tells you | What to check |
|---|---|---|
| Modality | The type of verification used, such as OTP, fingerprint, iris, face or demographic details. | Was this type of verification expected at that time? |
| Date and time | When UIDAI received and processed the authentication request. | Compare it with your visit, application or service activity. Check the time zone or displayed format before drawing conclusions. |
| AUA name | The authorised agency or service provider connected with the request. | Do you recognise the organisation or a service you recently used? |
| Response | Whether the request succeeded or failed. | A failed entry is not automatically proof of fraud. Read the error code. |
| UIDAI response code and AUA transaction ID | Reference details associated with the specific request. | Keep these details when contacting the agency for an explanation. |
| Error code | The reason UIDAI returned a failed authentication response. | Compare the code with UIDAI’s guidance and ask the service provider if the reason is unclear. |
For example, a failed biometric transaction could be caused by a mismatch or an operational problem. UIDAI lists error code 330 as “Biometrics locked by Aadhaar holder”. That code means biometric authentication was attempted while the biometric lock was active; it does not mean that the lock has been bypassed.
What should you do if you find an unknown authentication entry?
One unfamiliar entry deserves checking, but it is important not to assume that every unknown or failed transaction is identity theft. A service provider may use a different name in the record from the name you remember, or a verification attempt may have been retried after a failure.
- Check the date and time. Compare the entry with a bank visit, service-centre visit, benefit delivery, telecom request or online application you made around that time.
- Review the AUA name and modality. Note whether the entry came through OTP, biometric or demographic authentication. Search your own emails, messages or receipts for a related service.
- Keep the transaction references. Save or print the history entry for your records. Do not post a screenshot publicly because it may contain sensitive identifiers.
- Contact the AUA. Ask the agency named in the record to explain the transaction. Share only the details it needs through its verified support channel.
- Lock biometrics if you are concerned about biometric misuse. This blocks fingerprint, iris and face authentication while the lock is enabled. It does not stop OTP-based authentication.
- Contact UIDAI if the matter remains unresolved. Use the official helpline 1947 or email [email protected]. Quote the transaction date, response code and AUA transaction ID where available.
If you suspect that a bank account or payment instrument has also been compromised, contact the bank through its official fraud-reporting channel immediately. Aadhaar authentication history is not a bank statement and cannot show every activity in your financial accounts.
What is Aadhaar biometric locking?
Biometric locking is a UIDAI security feature that lets an Aadhaar holder prevent biometric authentication using the biometrics covered by the service. UIDAI’s current guidance lists fingerprints, iris and face authentication. When the lock is active, a service provider cannot complete Aadhaar authentication through those biometric modes for the locked Aadhaar holder.
Biometric locking is useful when you do not currently need fingerprint, iris or face authentication, or when you want an additional safeguard while investigating a suspicious biometric request. You can temporarily unlock biometrics when a legitimate service requires them and lock them again afterwards.
How to lock Aadhaar biometrics online
You can manage biometric locking through UIDAI’s myAadhaar services. A mobile number registered with Aadhaar is required for the OTP-based process.
- Visit the official myAadhaar portal.
- Open the Lock/Unlock Biometrics service under the Aadhaar security services.
- Follow the portal’s verification process. Keep your registered mobile phone ready to receive the OTP.
- Choose the option to lock or enable biometric locking, then submit the request as instructed on screen.
- Wait for the confirmation message and check the current lock status before leaving the service.
UIDAI also provides biometric lock and unlock through its official Aadhaar app. The app or portal may change its menu wording, so follow the live prompts. Never share the OTP with a caller or person claiming to complete the process for you.
How to unlock Aadhaar biometrics when you need them
A biometric lock can cause an authentication failure when a service requires your fingerprint, iris or face. Before visiting a bank, enrolment centre or service provider that uses biometric Aadhaar verification, check whether your biometrics are locked.
- Open the myAadhaar portal or official Aadhaar app.
- Go to Lock/Unlock Biometrics and complete the required verification using your registered mobile number.
- Select the temporary unlock option if you only need to complete a specific verification, or choose the option to disable biometric locking if you want to turn the feature off.
- Complete the required authentication while the temporary unlock is active.
- Check the lock status again after the transaction. UIDAI says a temporary unlock is generally valid for a limited period, usually 15 minutes, or for a single authentication transaction.
Do not unlock biometrics simply because an unknown caller says it is necessary. Start the process yourself from UIDAI’s official website or app, and only unlock when you are carrying out a service you initiated and trust.
Biometric lock vs Aadhaar number lock: know the difference
These are two separate security controls. Biometric locking is the narrower option when your concern is fingerprint, iris or face authentication. Aadhaar number locking is broader and can restrict authentication through the Aadhaar number, UID token and VID, including biometric, demographic and OTP modes.
| Feature | Biometric lock | Aadhaar number lock |
|---|---|---|
| What it blocks | Fingerprint, iris and face authentication. | Aadhaar-based authentication using UID, UID token and VID across biometric, demographic and OTP modes. |
| Can OTP authentication continue? | Yes, UIDAI says biometric locking does not affect OTP authentication. | No, Aadhaar number locking restricts OTP authentication through the locked UID/VID routes as described by UIDAI. |
| What is needed? | A registered mobile number for the service. | A valid 16-digit Virtual ID (VID) is required to lock Aadhaar. |
| When to consider it | When you want to stop biometric authentication but keep other supported methods available. | When you deliberately want to restrict Aadhaar-based authentication more broadly and understand the service impact. |
Do not choose Aadhaar number lock as a substitute for biometric lock without understanding the consequences. If a government or private service requires Aadhaar authentication, you may need to unlock your Aadhaar before using that service. UIDAI provides separate controls because they do different jobs.
What does Aadhaar error code 330 mean?
UIDAI identifies error code 330 as “Biometrics locked by Aadhaar holder”. It is returned when a biometric authentication request is made while the holder’s biometrics are locked. If you intentionally enabled biometric locking, this response is expected when a service attempts a fingerprint, iris or face check.
If you need to use a legitimate biometric service, temporarily unlock biometrics through UIDAI and retry within the permitted time. If you did not enable the lock and the code appears unexpectedly, review your biometric lock status through the official portal or app.
Important safety tips for Aadhaar users
- Bookmark the official myAadhaar portal instead of following links in unexpected SMS messages or emails.
- Never disclose an OTP, app PIN or full Aadhaar details to an unknown caller, agent or remote-support operator.
- Use the official Aadhaar app from Google Play or the Apple App Store. Check the publisher before installing.
- Review authentication history periodically, especially after using Aadhaar at a service centre or completing an unfamiliar verification.
- Keep your registered mobile number active. You need it for important online security services.
- Do not upload unredacted authentication-history screenshots to social media or public forums.
- Use biometric locking when it suits your needs, but remember to temporarily unlock it yourself before a legitimate biometric service that requires it.
Frequently asked questions
Can I check Aadhaar authentication history without a registered mobile number?
No. UIDAI says a registered mobile number is mandatory for Authentication History. If your current number is not registered or you cannot receive OTPs, update your mobile number through an Aadhaar Enrolment or Update Centre.
How many Aadhaar authentication records can I see?
UIDAI says the history covers the previous six months and displays up to 50 records at a time. Use a narrower date range to view additional records.
Can I check authentication history using a Virtual ID?
Yes. UIDAI’s Authentication History FAQ says you can use a Virtual ID as well as your Aadhaar number for this service.
Does biometric locking stop OTP-based Aadhaar verification?
No. Biometric locking blocks fingerprint, iris and face authentication. UIDAI says OTP-based authentication is not affected by biometric locking.
Does locking biometrics lock my entire Aadhaar number?
No. Biometric locking and Aadhaar number locking are different services. Aadhaar number locking is broader and restricts more authentication modes.
Can I temporarily unlock biometrics?
Yes. UIDAI says temporary biometric unlocking is available. It generally remains active for a limited period, usually 15 minutes, or for a single authentication transaction, after which biometrics are locked again.
Does a failed authentication record mean someone misused my Aadhaar?
Not necessarily. A failed transaction can result from an incorrect OTP, a biometric mismatch, a locked biometric or a technical issue. Review the modality and error code, and contact the AUA if you cannot identify the request.
Can I download or print my authentication history?
Yes. UIDAI’s FAQ says authentication history can be viewed and downloaded or printed from the portal for personal reference, subject to the available records and selected date range.
What should I do if I find an authentication request I did not make?
Note the AUA name and transaction references, contact that agency for details, and report the concern to UIDAI through its official helpline 1947 or email [email protected]. If biometric misuse is suspected, lock your biometrics while you investigate.
Official UIDAI links and references
Use these official resources for the latest service instructions. Portal and app screens may change, so the live UIDAI instructions take priority over screenshots or older tutorials.
| Resource | What it is for | Official link |
|---|---|---|
| myAadhaar portal | Authentication History, biometric lock/unlock and other Aadhaar services. | Open myAadhaar |
| UIDAI Authentication FAQ | Authentication History, available records, biometric lock and error-code guidance. | Read UIDAI guidance |
| UIDAI My Aadhaar | Official Aadhaar services and biometric security options. | View My Aadhaar |
| Aadhaar app for Android | Official UIDAI app listing on Google Play. | Get the Android app |
| Aadhaar app for iPhone | Official UIDAI app listing on the Apple App Store. | Get the iPhone app |
For help with an Aadhaar authentication record, use UIDAI’s official helpline 1947 or email [email protected]. Do not send your OTP or app PIN to anyone who offers to check the history on your behalf.
For more practical privacy guidance, read our guides on checking which Android apps can read your notifications and removing GPS location data from photos before sharing.